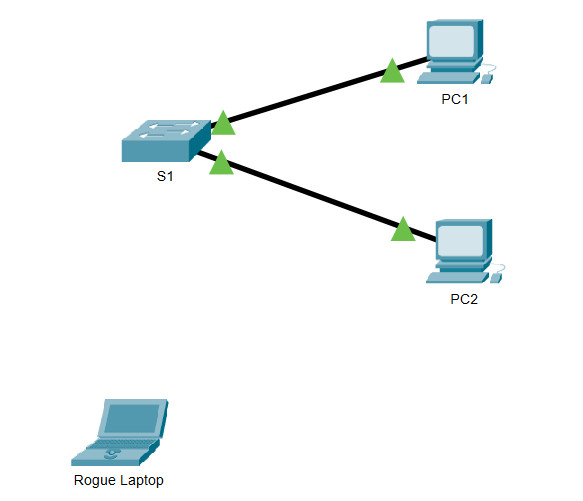
11.1.10 Packet Tracer – Implement Port Security (Instructor Version)

Addressing Table
| Device | Interface | IP Address | Subnet Mask |
|---|---|---|---|
| S1 | VLAN 1 | 10.10.10.2 | 255.255.255.0 |
| PC1 | NIC | 10.10.10.10 | 255.255.255.0 |
| PC2 | NIC | 10.10.10.11 | 255.255.255.0 |
| Rogue Laptop | NIC | 10.10.10.12 | 255.255.255.0 |
Objective
- Part 1: Configure Port Security
- Part 2: Verify Port Security
Background
In this activity, you will configure and verify port security on a switch. Port security allows you to restrict a port’s ingress traffic by limiting the MAC addresses that are allowed to send traffic into the port.
Step 1: Configure Port Security
a. Access the command line for S1 and enable port security on Fast Ethernet ports 0/1 and 0/2.
S1(config)# interface range f0/1 – 2
S1(config-if-range)# switchport port-security
b. Set the maximum so that only one device can access the Fast Ethernet ports 0/1 and 0/2.
S1(config-if-range)# switchport port-security maximum 1
c. Secure the ports so that the MAC address of a device is dynamically learned and added to the running configuration.
S1(config-if-range)# switchport port-security mac-address sticky
d. Set the violation mode so that the Fast Ethernet ports 0/1 and 0/2 are not disabled when a violation occurs, but a notification of the security violation is generated and packets from the unknown source are dropped.
S1(config-if-range)# switchport port-security violation restrict
e. Disable all the remaining unused ports. Use the range keyword to apply this configuration to all the ports simultaneously.
S1(config-if-range)# interface range f0/3 - 24 , g0/1 - 2
S1(config-if-range)# shutdown
Step 2: Verify Port Security
a. From PC1, ping PC2.
b. Verify that port security is enabled and the MAC addresses of PC1 and PC2 were added to the running configuration.
S1# show run | begin interface
c. Use port-security show commands to display configuration information.
S1# show port-security
S1# show port-security address
d. Attach Rogue Laptop to any unused switch port and notice that the link lights are red.
e. Enable the port and verify that Rogue Laptop can ping PC1 and PC2. After verification, shut down the port connected to Rogue Laptop.
f. Disconnect PC2 and connect Rogue Laptop to F0/2, which is the port to which PC2 was originally connected. Verify that Rogue Laptop is unable to ping PC1.
g. Display the port security violations for the port to which Rogue Laptop is connected.
S1# show port-security interface f0/2
How many violations have occurred?
h. Disconnect Rouge Laptop and reconnect PC2. Verify PC2 can ping PC1.
Why is PC2 able to ping PC1, but the Rouge Laptop is not?
Download PDF & PKA file:
[sociallocker id=”54558″]
[wpdm_package id=’39150′]
[wpdm_package id=’39151′]
[/sociallocker]
[alert-note][one_half]
Previous Lab
9.3.3 Packet Tracer – HSRP Configuration Guide
[/one_half][one_half_last]
Next Lab
11.6.1 Packet Tracer – Switch Security Configuration
[/one_half_last][/alert-note]
