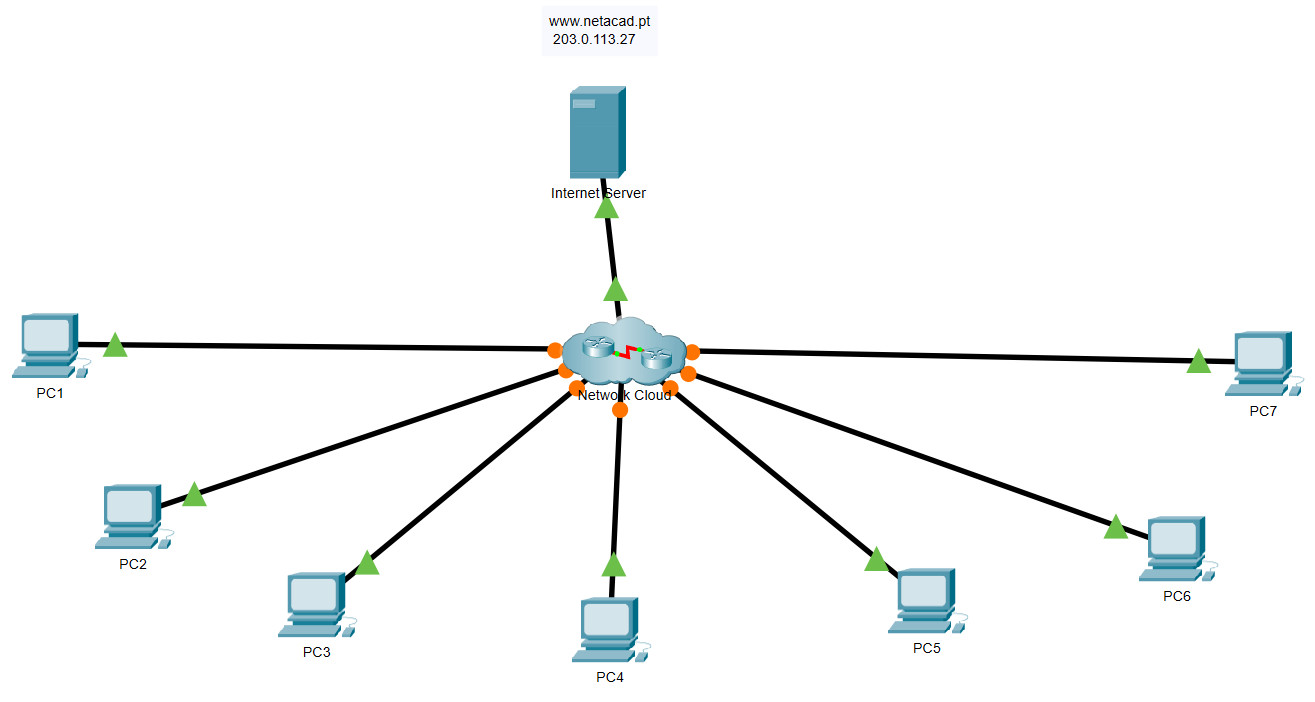
12.6.2 Packet Tracer – Troubleshooting Challenge – Use Documentation to Solve Issues (Instructor Version)
Instructor Note: Red font color or gray highlights indicate text that appears in the instructor copy only.

Addressing Table
| Device | Interface | Device Type (router, switch, host) |
IP Address | Subnet Mask | Default Gateway |
|---|---|---|---|---|---|
| PC1 | NIC | host | 192.168.1.153 | 255.255.255.0 | 192.168.1.1 |
| PC2 | NIC | host | 192.168.3.50 | 255.255.255.0 | 192.168.3.1 |
| PC3 | NIC | host | 192.168.4.115 | 255.255.255.0 | 192.168.4.1 |
| PC4 | NIC | host | 192.168.5.83 | 255.255.255.128 | 192.168.5.1 |
| PC5 | NIC | host | 192.168.5.227 | 255.255.255.128 | 192.168.5.129 |
| PC6 | NIC | host | 192.168.2.48 | 255.255.255.224 | 192.168.2.33 |
| PC7 | NIC | host | 192.168.2.67 | 255.255.255.224 | 192.168.2.65 |
| Hub | G0/0/0 | router | 192.0.2.1 | 255.255.255.252 | N/A |
| Hub | S0/1/0 | router | 192.168.0.1 | 255.255.255.252 | N/A |
| Hub | S0/1/1 | router | 192.168.0.5 | 255.255.255.252 | N/A |
| Hub | S0/2/0 | router | 192.168.0.9 | 255.255.255.252 | N/A |
| Hub | S0/2/1 | router | 192.168.0.13 | 255.255.255.252 | N/A |
| Branch-1 | G0/0/0 | router | 192.168.1.1 | 255.255.255.0 | N/A |
| Branch-1 | S0/1/0 | router | 192.168.0.2 | 255.255.255.252 | N/A |
| Branch-2 | G0/0/0 | router | 192.168.2.33 | 255.255.255.224 | N/A |
| Branch-2 | S0/1/0 | router | 192.168.0.6 | 255.255.255.252 | N/A |
| Factory | G0/0/0 | router | 192.168.3.1 | 255.255.255.0 | N/A |
| Factory | G0/0/1 | router | 192.168.4.1 | 255.255.255.0 | N/A |
| Factory | S0/1/0 | router | 192.168.0.14 | 255.255.255.252 | N/A |
| HQ | G0/0/0.1 | router | 192.168.6.1 | 255.255.255.0 | N/A |
| HQ | G0/0/0.5 | router | 192.168.5.1 | 255.255.255.128 | N/A |
| HQ | G0/0/0.10 | router | 192.168.5.129 | 255.255.255.128 | N/A |
| HQ | S0/1/0 | router | 192.168.0.10 | 255.255.255.252 | N/A |
| SW-B1 | VLAN 1 | switch | 192.168.1.252 | 255.255.255.0 | 192.168.1.1 |
| SW-B2 | VLAN 1 | switch | 192.168.2.62 | 255.255.255.0 | 192.168.2.1 |
| SW-F1 | VLAN 1 | switch | 192.168.3.252 | 255.255.255.0 | 192.168.3.1 |
| SW-F2 | VLAN 1 | switch | 192.168.4.252 | 255.255.255.0 | 192.168.4.1 |
| SW-HQ1 | VLAN 1 | switch | 192.168.6.252 | 255.255.255.0 | 192.168.6.1 |
| SW-HQ2 | VLAN 1 | switch | 192.168.6.253 | 255.255.255.0 | 192.168.6.1 |
| SW-HQ3 | VLAN 1 | switch | 192.168.6.254 | 255.255.255.0 | 192.168.6.1 |
Objectives
In this lab, you use network documentation to identify and fix network communications problems.
- Use various techniques and tools to identify connectivity issues.
- Use documentation to guide troubleshooting efforts.
- Identify specific network problems.
- Implement solutions to network communication problems.
- Verify network operation.
Background / Scenario
In this activity, you will use the documentation that you created in the Packet Tracer – Troubleshooting Challenge – Document the Network activity to guide network troubleshooting efforts.
It has been discovered that the network that you worked with in the previous PT activity has developed communication problems. Some hosts are unable to ping other hosts and the internet server. It is your job to determine what the issues are and to locate and repair them.
Network issues could exist in any device. Be sure to check for comprehensive errors:
- Addressing configuration
- Interface activation
- Routing
- NAT
Instructions
Passwords for all devices are VTY: cisco, Enable secret: class
Part 1: Assess Connectivity
All hosts should be able to ping each other and the internet server. Determine if this requirement is met. If not, identify which hosts and networks should be further investigated.
Part 2: Access Network Devices
From the hosts which have communication problems, use ICMP tools to determine where in the network these problems may be located. From the host PCs, access devices in the network and display configurations and operational status.
Part 3: Repair the Network
After locating the issues, reconfigure the devices to repair the connectivity problem. Use your documentation from the previous activity to help you.
Part 4: Document the Issues
Record your issues in the table below.
| Device | Issue | Action |
|---|---|---|
Instructor Note:
There are five problems in the network. Students should start at the hosts, ping the default gateway and then use ICMP trace to determine where the break in the communication path exists. They should then use Telnet, their documentation, and CDP to access various devices on the path. They should use appropriate show commands to view the configuration and operation of the devices on the path in order to locate the problems.
Problem 1:
PC1 can ping its default gateway and some other devices in the network, but it cannot ping Internet Server. Further testing reveals that some other PCs can reach the server. This indicates that the issue is likely related to the path that PC1 is taking to reach the internet. A trace indicates that packets only reach the Hub router.
Solution 1:
Students should Telnet to the nearest interface of the Hub router and inspect its configuration. There, the student will discover that the ip nat inside configuration statement is missing from the interface that connects the Hub router to the Branch-1 router. This statement should be added to the configuration and PC1 should now be able to reach Internet Server.
On PC1, go to Command Prompt, Enter: telnet 192.168.1.1, password cisco
C:\>telnet 192.168.1.1
Trying 192.168.1.1 ...Open


User Access Verification

Password:
Branch-1>en
Password:
Branch-1#telnet 192.168.0.1
Trying 192.168.0.1 ...Open


User Access Verification

Password:
Hub>en
Password:
Hub#config ter
Hub(config)#interface s0/1/0
Hub(config-if)#ip nat inside
Problem 2:
PC3 cannot ping the internet server. Further, it is found that it cannot ping its gateway or other devices on the network.
Solution 2:
These tests indicate that the issue is either with the gateway or with the PC itself. Inspection of the IP addressing of PC3 shows that the addressing is correct. In addition, a green link light shows at the PC, so the link between the PC and LAN switch is up. Students should know from their documentation that PC 2 is connected to the Factory router, as is PC3. Because PC3 can’t ping its gateway, the student should telnet from PC2 to the router to inspect its configuration. It will be found that Gigabit Ethernet 0/0/1 interface of the Factory router is shutdown. Activating the interface should enable PC3 to only ping directly connected hosts.
On PC2, telnet to Factory Router through Default gateway:
C:\>telnet 192.168.3.1
Trying 192.168.3.1 ...Open


User Access Verification

Password: cisco
Factory>enable
Password: class
Factory#show ip int brief
Interface              IP-Address      OK? Method Status                Protocol
GigabitEthernet0/0/0   192.168.3.1     YES manual up                    up
GigabitEthernet0/0/1   192.168.4.1     YES manual administratively down down
Serial0/1/0            192.168.0.14    YES manual up                    up
Serial0/1/1            unassigned      YES unset  administratively down down
Vlan1                  unassigned      YES unset  administratively down down
Factory#conf t
Enter configuration commands, one per line.  End with CNTL/Z.
Factory(config)#interface g0/0/1
Factory(config-if)#no shutdown
Problem 3:
Even after the LAN interface for PC3 is activated, no devices can ping PC3 except for PC2, which is directly connected to the factory router. Similarly, PC3 can ping no devices on other networks.
Solution:
Inspection of the configuration of the Factory router indicates that the OSPF network statement for the PC3 LAN, 192.168.4.0/24, is missing. Adding this network statement restores connectivity to and from the LAN.
Factory(config)#router ospf 10
Factory(config-router)#network 192.168.4.0 0.0.0.255 area 0
Problem 4:
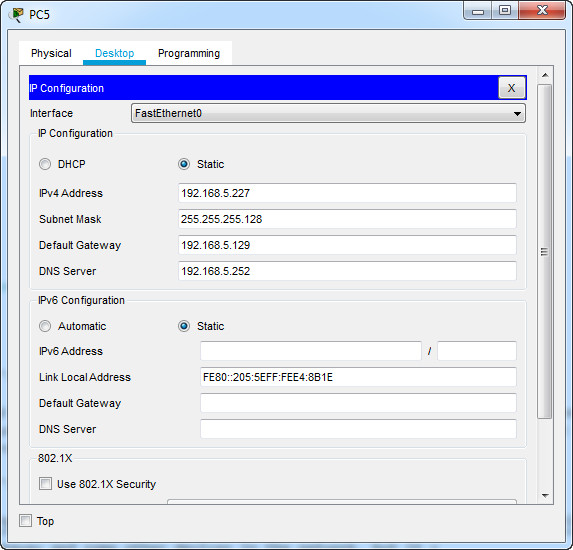
It is found the PC5 cannot ping its gateway. However, it cannot ping other PCs on the network or Internet Server.
Solution 4:
While it is tempting to go directly to the gateway router to look for the problem. inspection of PC5 addressing shows that it is missing its default gateway address. Adding this address solves the problem. The address should be available in the network documentation or by accessing the HQ router from another PC that has connectivity.
On PC4, telnet to HQ Router through Default gateway
C:\>telnet 192.168.5.1
Trying 192.168.5.1 ...Open


User Access Verification

Password:
HQ>enable
Password:
HQ#show ip int brief
Interface              IP-Address      OK? Method Status                Protocol
GigabitEthernet0/0/0   unassigned      YES unset  up                    up
GigabitEthernet0/0/0.1 192.168.6.1     YES manual up                    up
GigabitEthernet0/0/0.5 192.168.5.1     YES manual up                    up
GigabitEthernet0/0/0.10192.168.5.129   YES manual up                    up
GigabitEthernet0/0/1   unassigned      YES unset  administratively down down
Serial0/1/0            192.168.0.10    YES manual up                    up
Serial0/1/1            unassigned      YES unset  administratively down down
Vlan1                  unassigned      YES unset  up                    down

Problem 5:
PC6 and PC7 can ping their default gateway addresses and each other but cannot ping the internet server. In fact, the default gateway router returns a destination host unreachable message, which usually means that a route to the destination network is not known by the gateway router.
Solution 5:
The ping result indicates that the default gateway router, Branch-2, probably does not have a route to reach the internet server. Students may have noticed after displaying routing tables on other routers that a default route is being distributed through OSPF. The student should access the default gateway router and display the routing table. Students should see that no routes have been received through OSPF, including the default route. After inspecting the device configuration, it appears that OSPF is correctly configured. Therefore, the problem must be with the link over which the router should have received the OSPF updates. Inspection indicates that the S0/1/0 interface IP address is misconfigured. The address should be changed to 192.168.0.6/30. This will restore Layer 3 connectivity with the Hub router and allow OSPF updates to be received.
On PC6, telnet to Branch-2 Router through Default gateway:
C:\>telnet 192.168.2.33
Trying 192.168.2.33 ...Open


User Access Verification

Password:
Branch-2>en
Password:
Branch-2#conf t
Branch-2(config)#int s0/1/0
Branch-2(config-if)#ip address 192.168.0.6 255.255.255.252
Download Packet Tracer Completed File and Full Topology
[sociallocker id=”54558″]
[wpdm_package id=’55983′]
[wpdm_package id=’55984′]
[wpdm_package id=’56609′]
[wpdm_package id=’56611′]
[/sociallocker]
[alert-note][one_half]
Previous Lab
12.6.1 Packet Tracer – Troubleshooting Challenge – Document the Network
[/one_half][one_half_last]
[/one_half_last][/alert-note]
